How To Set Up And Use Dji Spark Guide
Set Up DJI Spark With Your Smartphone
Note Before proceeding, make sure to completely charge all the batteries of the Spark.
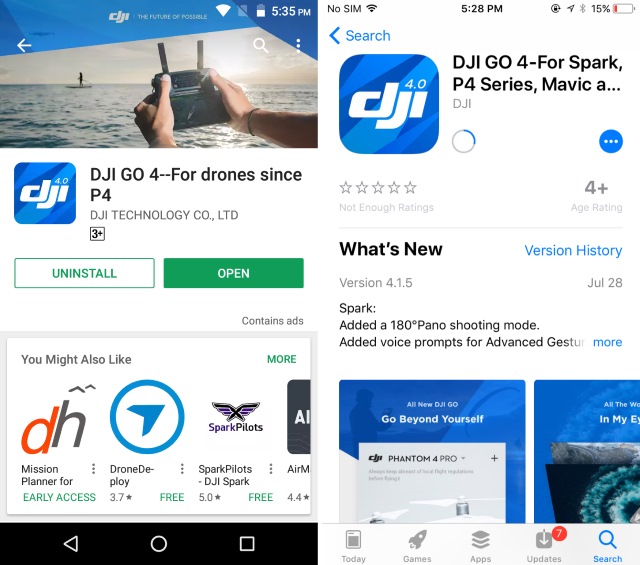
To start off, download the DJI GO 4 app for your smartphone. It is completely free and is available for both Android and iOS.
Open the DJI app and “Login” with your DJI account. If you don’t have one, tap the “Register” option to create a new account.
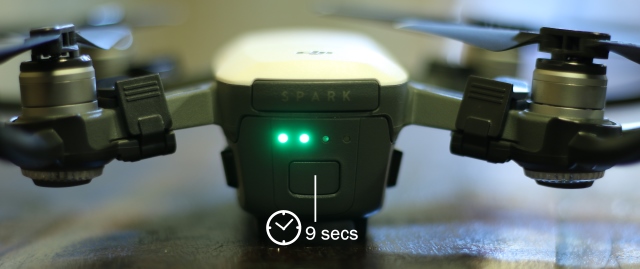
Now, connect the battery to your DJI Spark and turn it on. To do so, press and hold the battery power button for 3 seconds. Now, hold the drone power button for 9 seconds till you hear 3 continuous beeps.
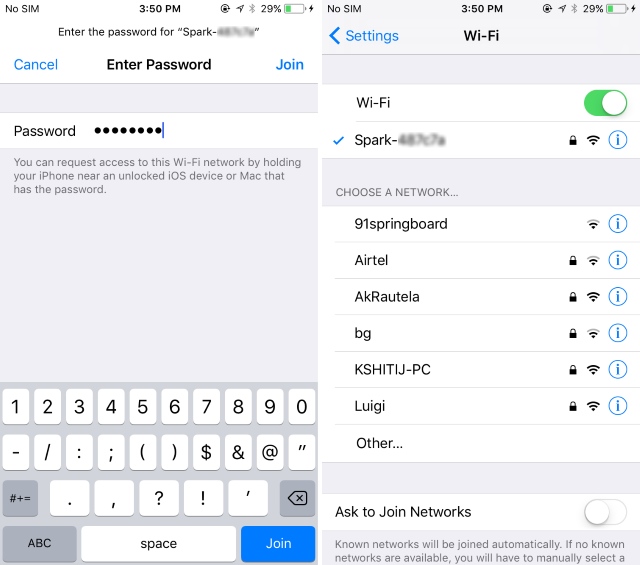
Now, open the WiFi settings on your smartphone and connect to the drone’s WiFi. The WiFi details should be mentioned on the drone’s box or underneath the battery compartment.
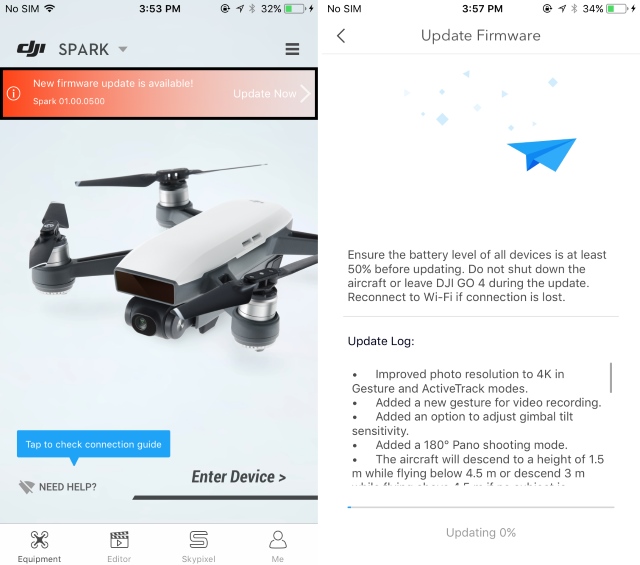
Once you’ve connected to the drone’s WiFi, open the DJI GO 4 app. The app will now check for any firmware updates. If found, reconnect to your WiFi with Internet access and download the update file. Then, reconnect to the drone’s WiFi and update its firmware.
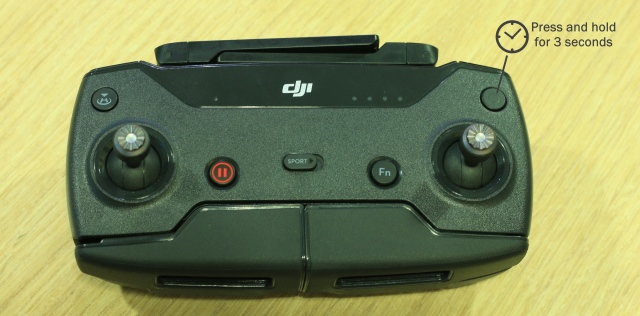
Next up, power up the remote controller by pressing the power button once, and then holding it for 3 seconds.
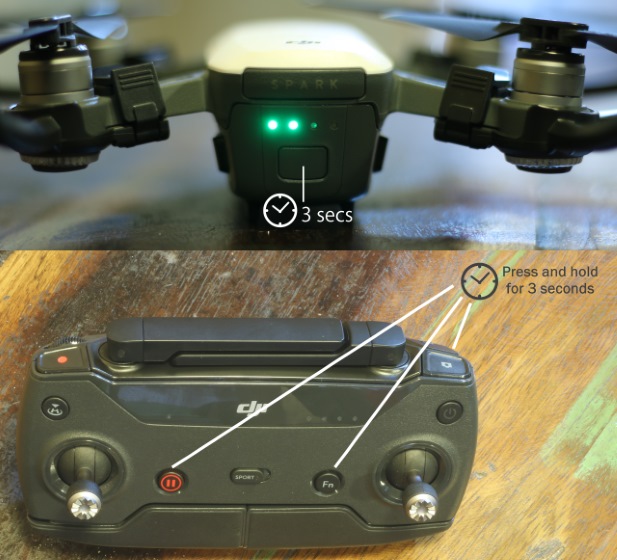
Now, we need to pair up the remote controller with the drone. To do that, hold the battery power button on the drone for 3 seconds until you hear a single beep. Now, hold the Pause, Function and the Action button on the remote controller for 3 seconds till it starts beeping. The remote controller will now start pairing with the drone.
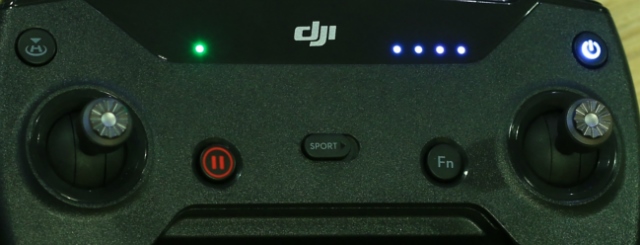
Once it has been paired, the front 2 LEDs on the drone will first blink green and then turn solid red. Also, the status LEDs on the remote controller will turn solid green as well.
Now, we need to hook up the smartphone to the remote controller. To do so, open the WiFi settings and connect to the remote controller’s WiFi. Note that this WiFi will be different from the aircraft’s WiFi, and the credentials for the same can be found on the back side of the remote controller.
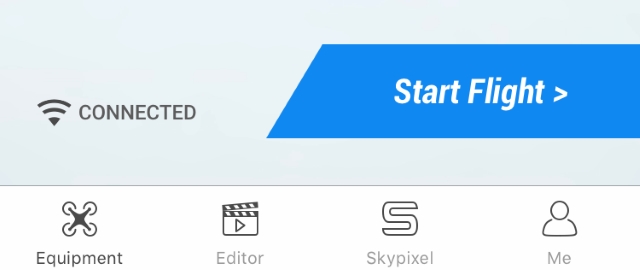
Once you’ve connected to the remote controller’s WiFi, open the DJI GO 4 app. If you see a text dialog that says “Connected”, that means you’re good to go. If not, repeat all the steps from the beginning.
Controlling the DJI Spark
1. Taking Off
Before taking off the drone, make sure that there is ample space around the drone to ensure proper flight. Also, this step refers to simply hovering the device above the ground. You can take off the drone by following either of the three steps:
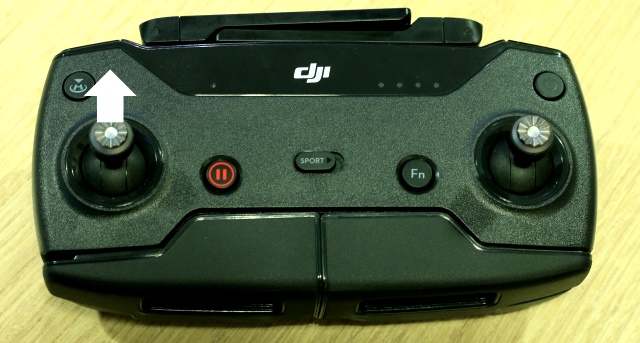
Simply move the life stick on the remote controller in the upwards direction slowly to initiate the take-off.
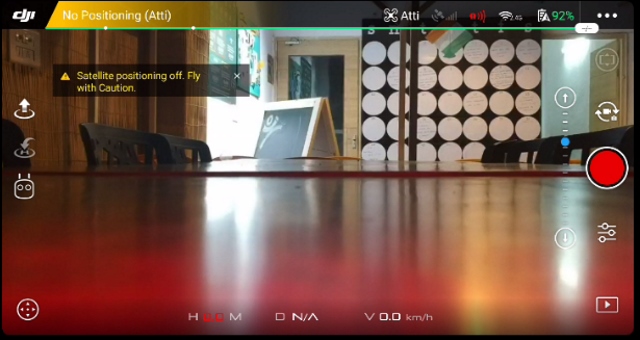
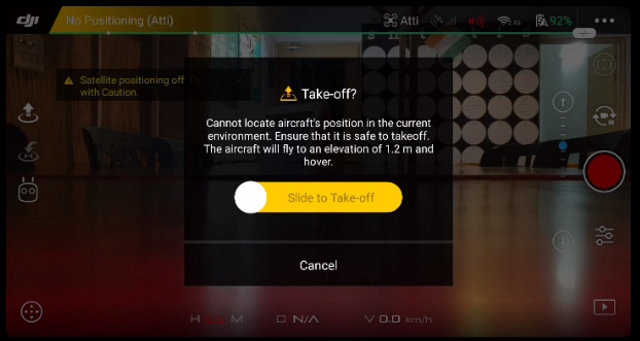
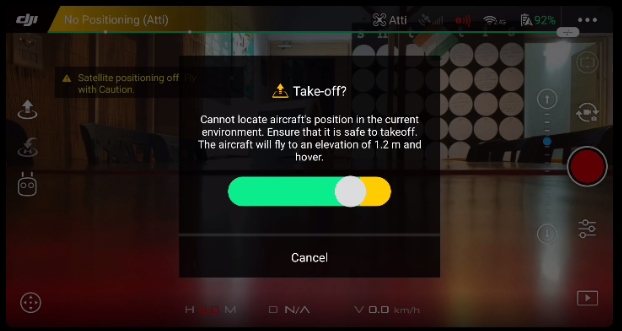
The second option is to tap on the take-off button, located in the top-left corner of your screen on the DJI GO 4 app. Upon tapping it, you’ll get a notification for confirmation of take-off. Simply slide to confirm the take-off sequence.
Finally, if you have the gesture-controls enabled on the device, just hold the device in your hand and slowly raise your hand to guide the drone to take-off.
2. Controlling the DJI Spark Using Gestures
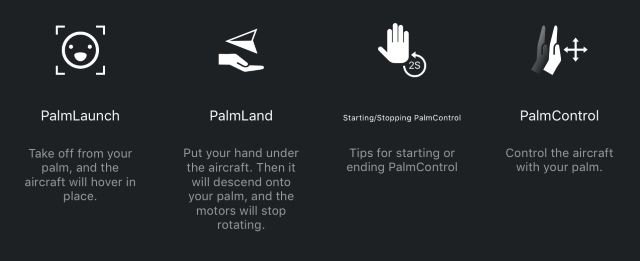
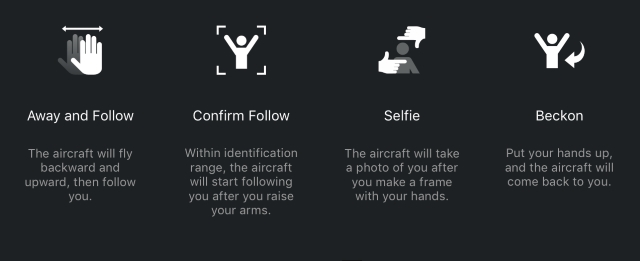
The main USP of the DJI Spark is the fact that it can be used simply with the help of gestures, without the need for any smartphone or remote controller. With the help of a sensor on Spark, you can launch the device from your hand, make it follow you, take simple selfies and make it land back on the palm of your hand as well. Do note that in this mode, the drone will not go far off and should always be facing you. Overall, the gesture mode works really well and is simple to use for clicking simple selfies. Take a look at the picture below for the various gestures you can use to control the DJI Spark:
Note: The gesture mode should only be used in windless or areas with a low-velocity wind, otherwise, the camera may be unstable, rendering it impossible to control the drone.
3. Controlling DJI Spark with the DJI GO 4 App
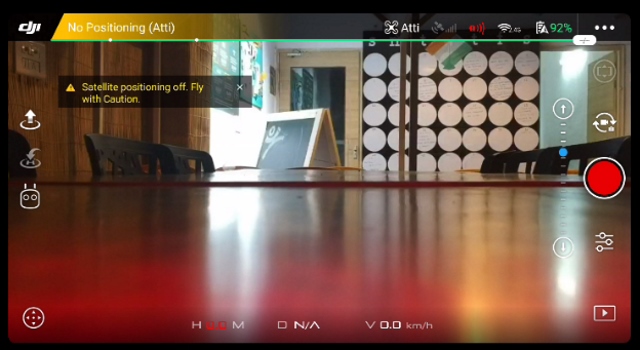
The DJI GO 4 App can be used for a variety of functions to make the most of your flight time. The main screen of the app houses options for the aircraft status, take-off, landing, compass, camera shutter button, and the settings page. Also, during flight, the main screen also shows a battery bar, depicting the flight time left according to the drone’s battery.
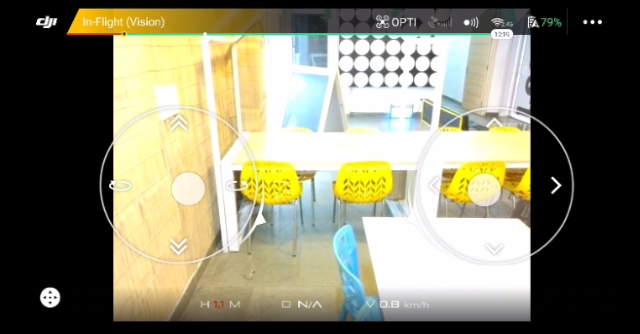
The DJI GO 4 App can be used to control the movement of the device as well, which basically simulates the remote controller’s sticks on the device’s screen. You can use it maneuver the device and fly it straight from your smartphone. The app allows you to move the drone as well as rotate. It also allows you move the camera up and down, changing the area of focus.
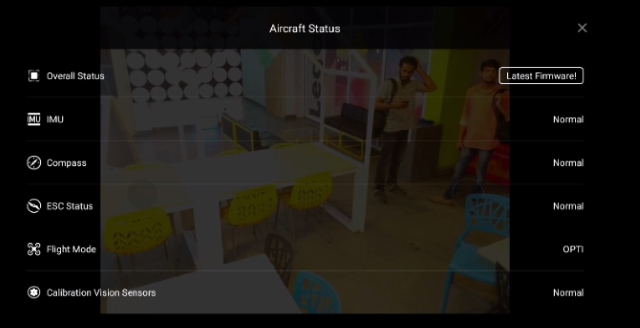
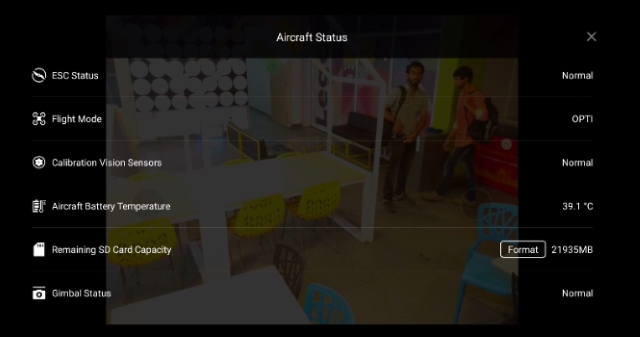
The “Aircraft Status” page can be accessed by tapping on the “In-Flight(vision)” option on the top left, which shows you a lot of options related to the aircraft. You can check the overall status, flight mode, calibrate your compass, modify the Inertial Measurement Units (IMU), modify the Electronic Speed Controller (ESC) and more. It can also be used to configure the remote controller, as well as re-program the ‘Fn’ and ‘C’ keys on the controller.
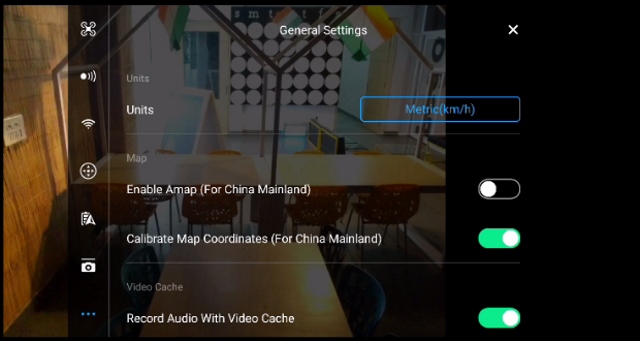
Tapping on the 3-dot menu in the top-right corner of the main page in the app shows the General Settings for the app. The settings page comes with a sidebar of its own which allows the user to access the Main Controller Settings, Visual Navigation Settings, Remote Controller Settings, WiFi Settings, Aircraft Battery Info, and the Gimbal Settings. These settings can be used to configure the max distance, max height, turn Beginner mode on, change the Measurement Units, select the Live Broadcast Platform, allow for audio to be saved with the video cache on the device and more.
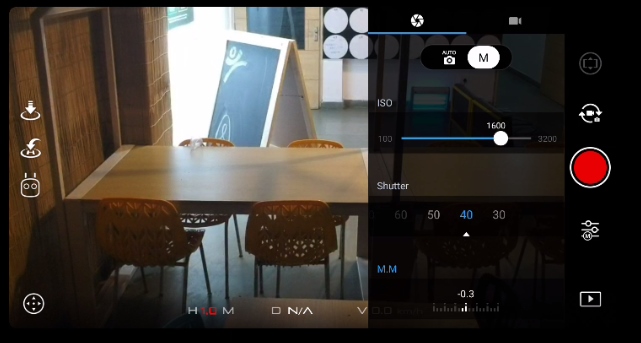
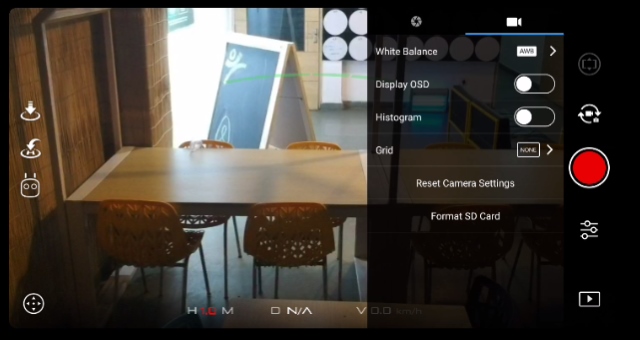
Located below the camera’s shutter button is the camera’s advanced settings page. With the help of this menu, you can adjust the shutter rate, change the shooting mode from single shot to burst shot, adjust the ISO, exposure, white balance and more. You can also use this menu to format the SD card, show the Camera’s On-Screen Display and more.
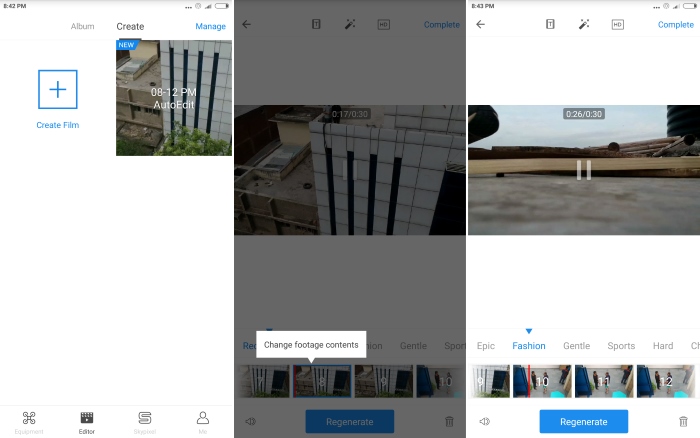
Lastly, the DJI GO 4 app also comes bundled with DJI’s own video editing software as well, that allows the user to easily edit the videos captured by the drone. You can combine multiple clips, crop them, add transitions and effects and much more, just by the help of a few taps. Do note that these videos are saved in the app’s video cache, and need to be exported first in order to view them from the device’s gallery.
4. Controlling the Drone Via Remote Control
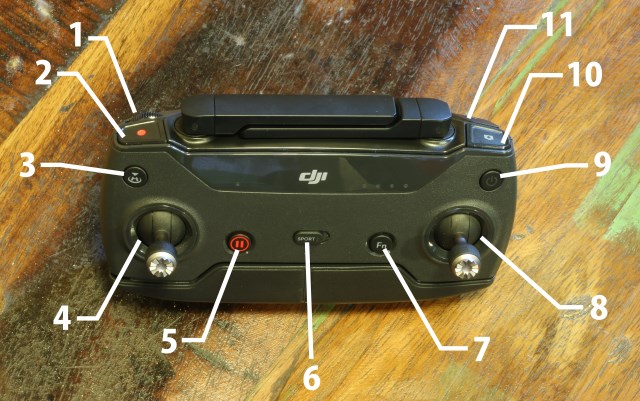
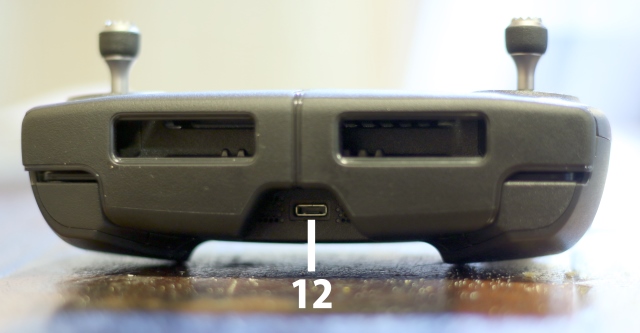
Alternatively, if you’ve bought the Fly More combo, you would get the Remote Controller for the DJI Spark included in the package. The DJI Spark’s Remote Controller can be used to control the device while in flight, and take pictures and record videos as well. Each button has a specific function associated with it, as mentioned in the list below.
SEE ALSO: 7 Best DJI Spark Alternatives You Can Buy
Set Up And Use The DJI Spark Drone With Ease
Overall, the DJI Spark is a great device and proves to be handy for beginners as well as professional users. The ease of use combined with the plethora of features make it a compelling drone that someone can quickly get accustomed to. As a parting note, I’d like to mention that while flying drones might be a lot of fun and open the gateway to a whole new photography world, make sure to always fly with proper permission. Flying drones in some areas can be illegal, so do keep a note of that. Once that is sorted, take out your DJI Spark, and capture the world in a different view. Share with us your favorite ideas for drone shots and how you intend to use your DJI Spark in the comments section below.